Deploy Serverless Function
This tutorial will guide you through deploying your serverless function to the Oyster network.
Prerequisites
Before proceeding, ensure you have:
- A MetaMask wallet installed
- Some Arbitrum One ETH
- Node.js installed
- Terser installed as command line app
Prepare the Code
Create a file named hello.js with the following serverless function:
addEventListener("fetch", event => {
  event.respondWith(new Response("Hello World"));
});
Next, minify your JavaScript code to reduce its size using Terser:
terser hello.js -m -o hello.min.js
After minification, check the hello.min.js file. You should notice it's significantly smaller than the original hello.js.
To make the minified code more readable, you can use the js-beautify npm package.
Provision the Code
Navigate to Arbiscan and search for the contract address: 0x061868A3387c5F6a875c111a2FDDEB70C66344F4
Select the Contract tab, then click Write Contract
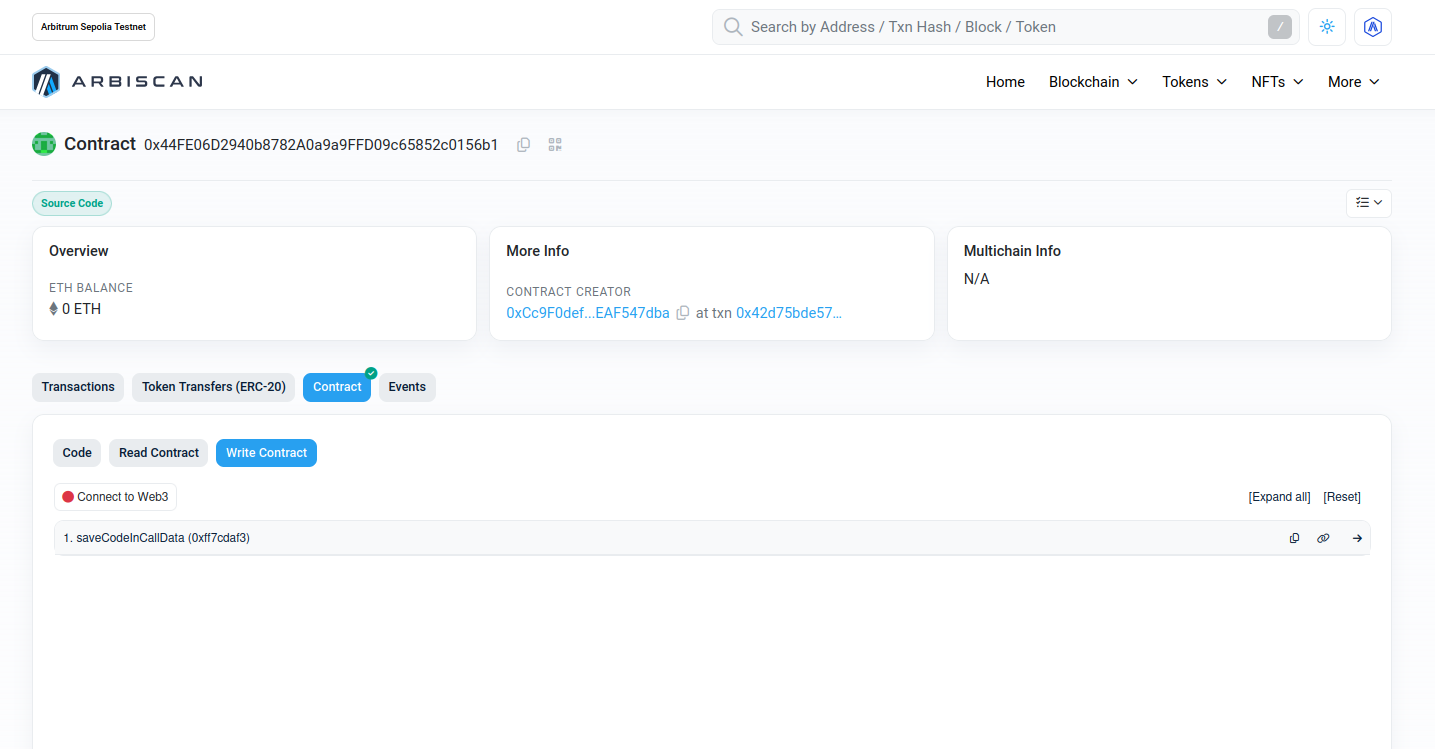
Click on Connect to Web3 to connect your wallet
Find the saveCodeInCalldata function and paste your minified code from hello.min.js into the inputData field.
Click on Write to submit the transaction. MetaMask will prompt you to confirm the transaction.

You can check the confirmed transaction by clicking on the View your transaction.

The transaction should look something like this: https://arbiscan.io/tx/0x27139ece7a6558c26c3773647822837612a5159c0d757c96cc86c008466dfb7a
Once the transaction is confirmed, your code is now provisioned on the blockchain.
Next Steps
Now that you have successfully provisioned your code, you can proceed to test it by making a Web2 request. Follow the instructions in the Web2 Request guide to learn how to execute your serverless function and verify the responses.
Congratulations! You have completed the code provisioning tutorial.